Levelling system for tiles - only from Karl Dahm in many practical set designs. Lay the perfect tiled floor with XXL tiles, wood-look tiles or natural stone tiles, the result is always toothless and perfect. Levelling system for tiling professionals. Achieve perfect surfaces with large format tiles and thin joints. Karl Dahm tile levelling system. Levelling System - Tile Levelling System for the tile professional by Karl Dahm. With Levelling System you can achieve perfect, toothless surfaces even with large format tiles.
Tile levelling system, tile laying system
Tile laying system for the flat laying of porcelain stoneware, tiles and natural stone
Tile Installation System for perfectly flat installation of porcelain tiles, ceramic tiles, and natural stone.
Discover innovative solutions to lay tiles, natural stone, and porcelain with precision, efficiency, and without lippage. Whether you're a DIY enthusiast or a professional, we have the perfect system for your project.
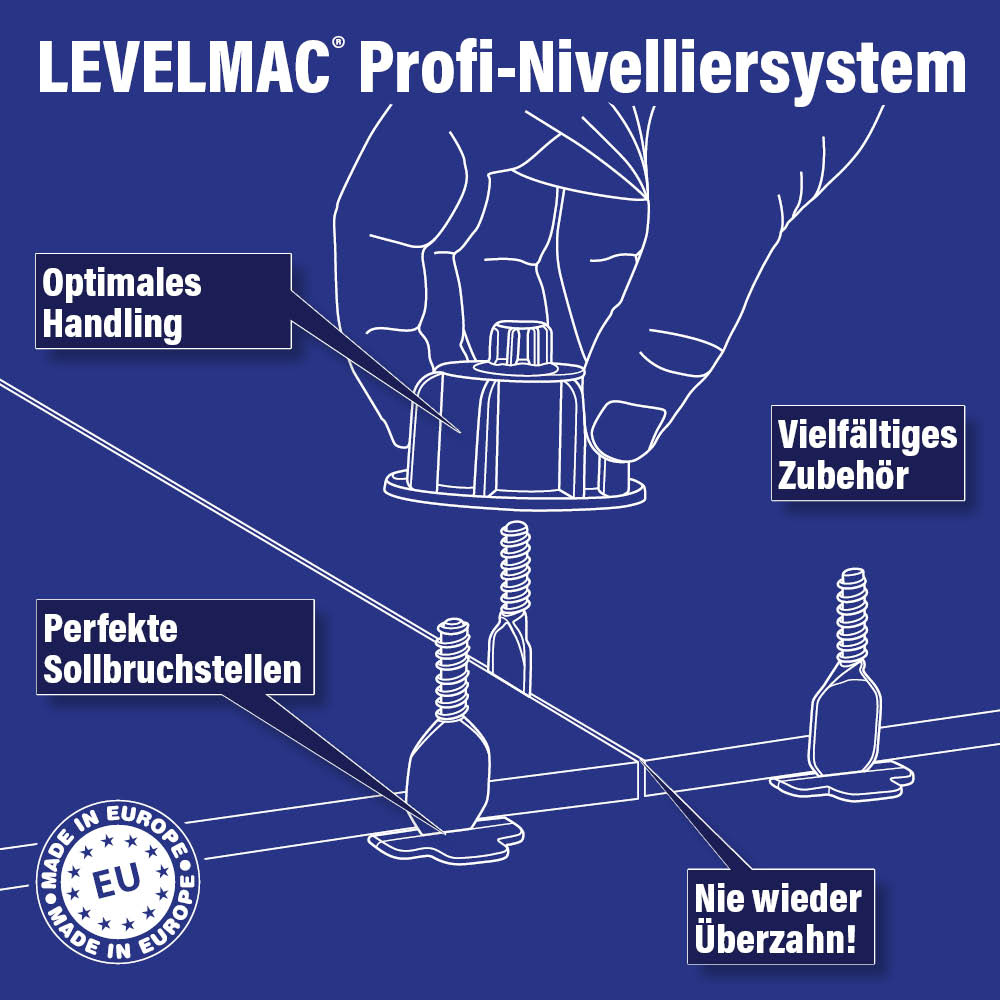
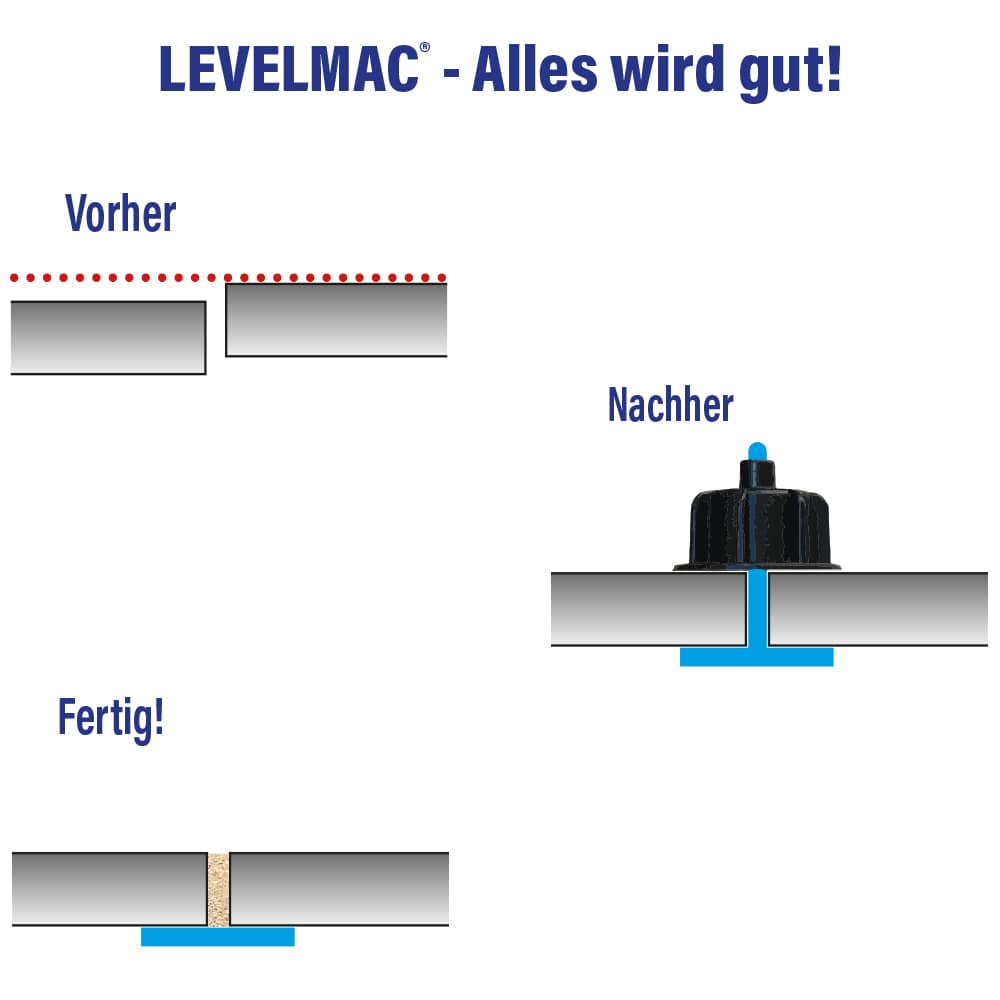
The LEVELMAC® levelling system ensures precise and fast tile installation with perfect levelling and uniform joint spacing—ideal for large-format tiles.
How to Use:
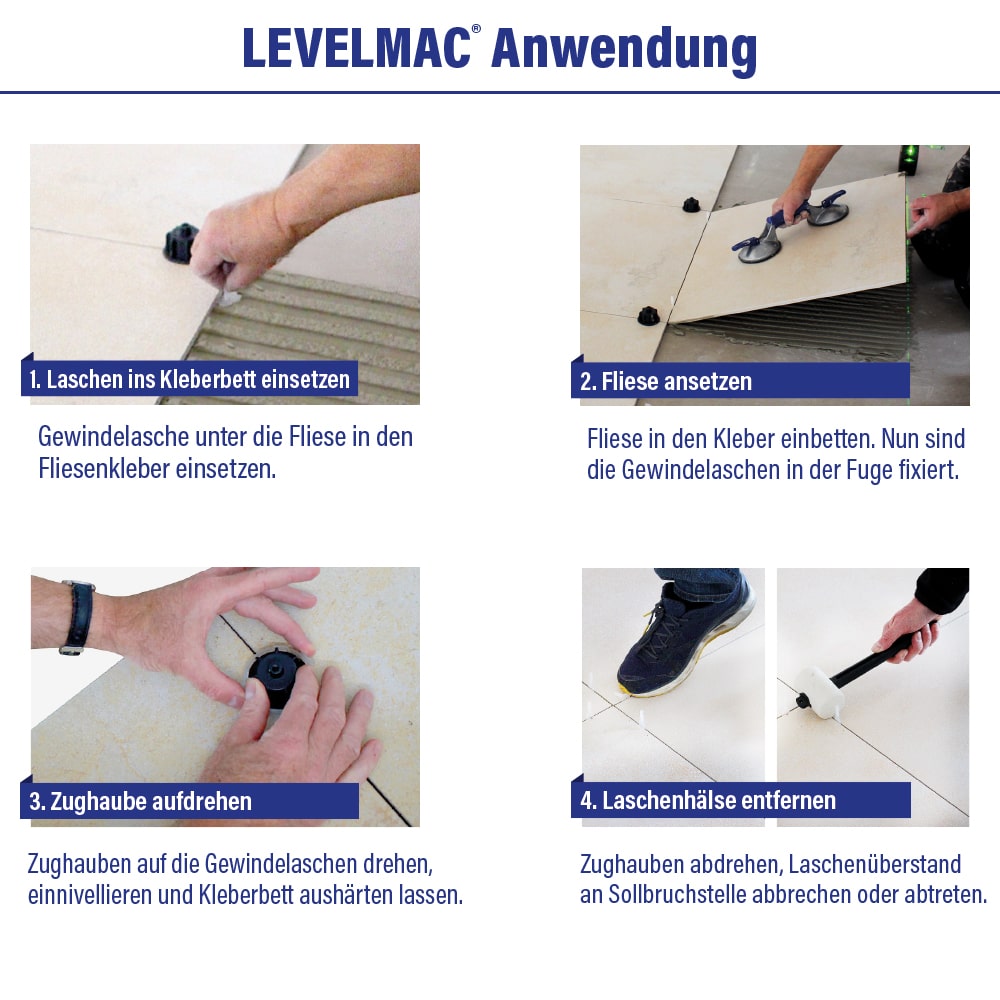
- Prepare the substrate: Ensure it is clean, flat, and well-prepared.
- Apply tile adhesive: Spread the adhesive evenly with a trowel.
- Insert threaded spacers: Place the spacers under the tile in the adhesive bed.
- Lay the tiles: Position the next tile onto the spacer.
- Attach levelling caps: Screw the caps onto the spacers to level the tiles.
- Allow to dry: Remove the caps and break off the spacers.
Advantages:
- Perfect levelling: Prevents lippage and ensures uniform joints.
- Reusable components: Save costs with reusable caps.
- Versatility: Suitable for tile thicknesses from 3 mm to 20 mm.
- Ease of use: Quick and simple application without additional tools.
- Cost-efficient: Affordable threaded spacers.
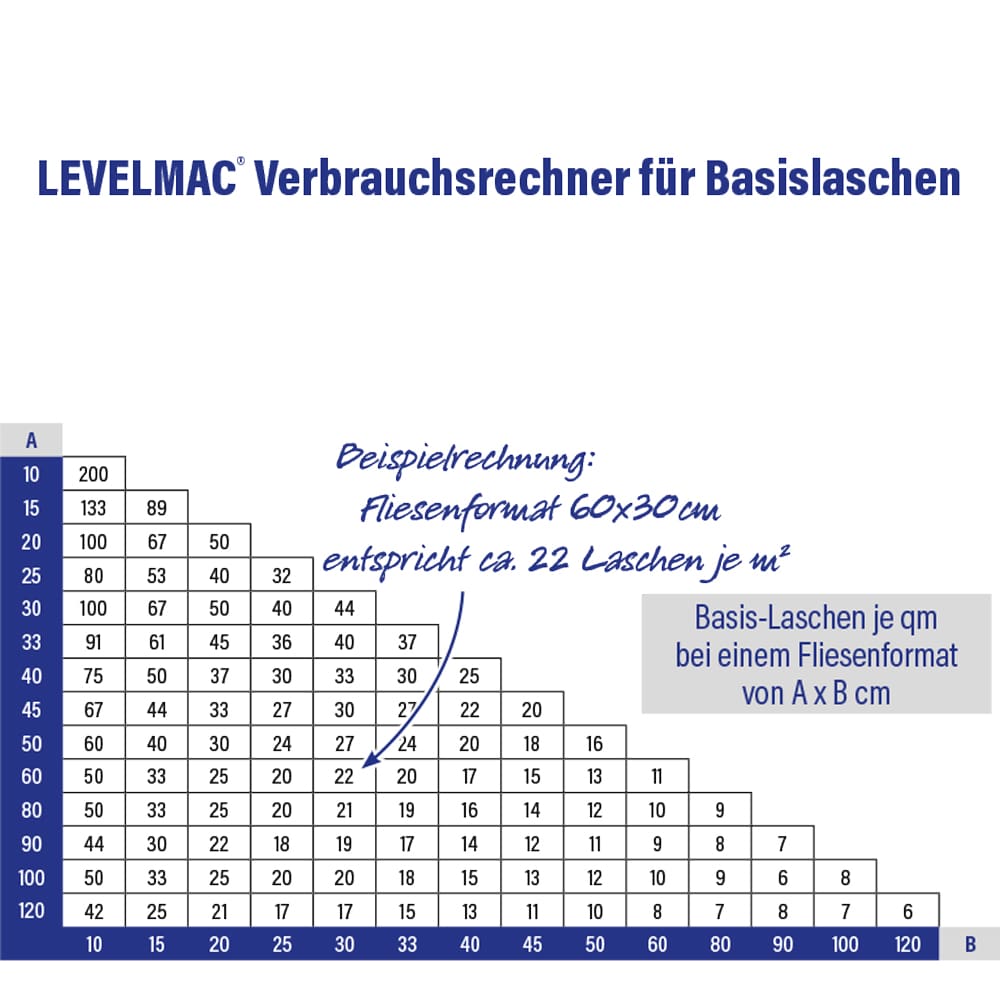
Recommended Quantities per m²:
Sets and Accessories:
- Starter Set 2 mm (100 spacers, 30 black caps), Art. No. 12504
- Basic Set in 12L bucket (250 spacers, 50 caps):
- Maxi Set in 33L bucket (1,500 spacers, 150 caps):
- XXL Set (2,500 spacers, 300 caps):
- Jumbo Set (5,000 spacers, 600 caps):
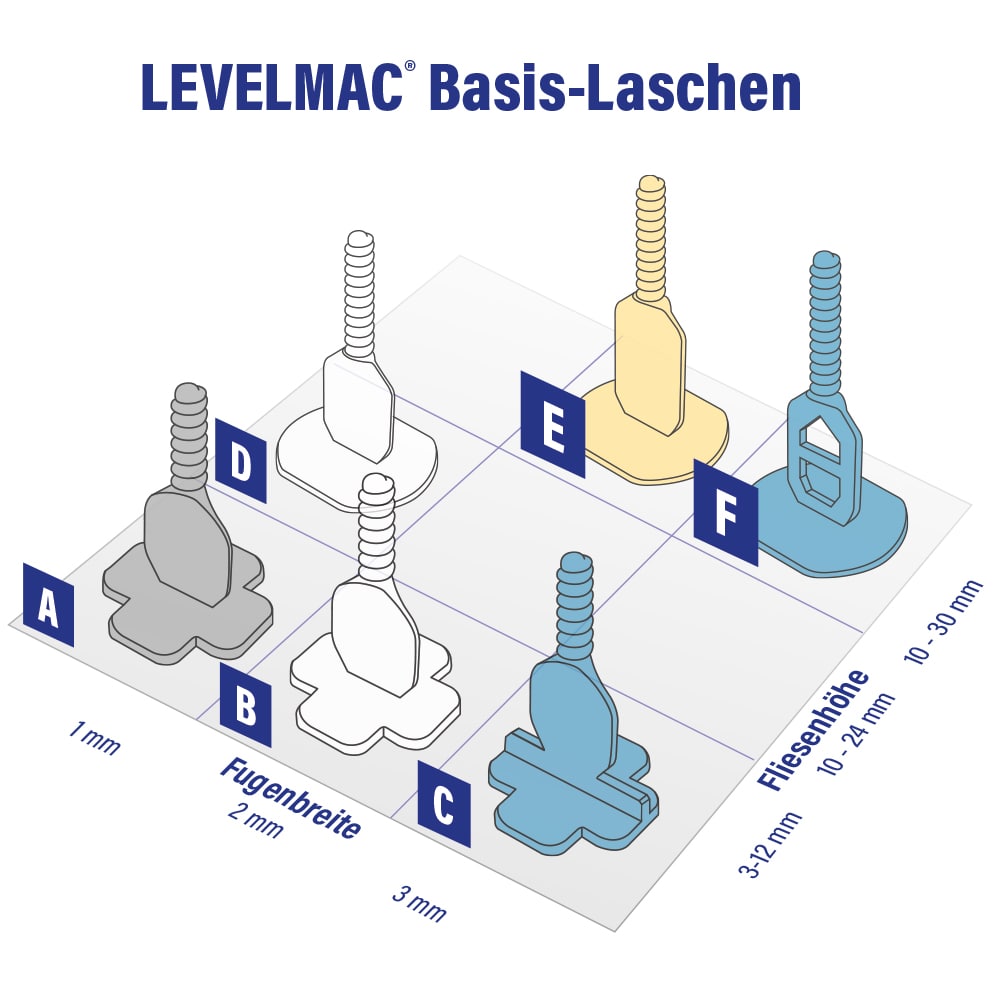
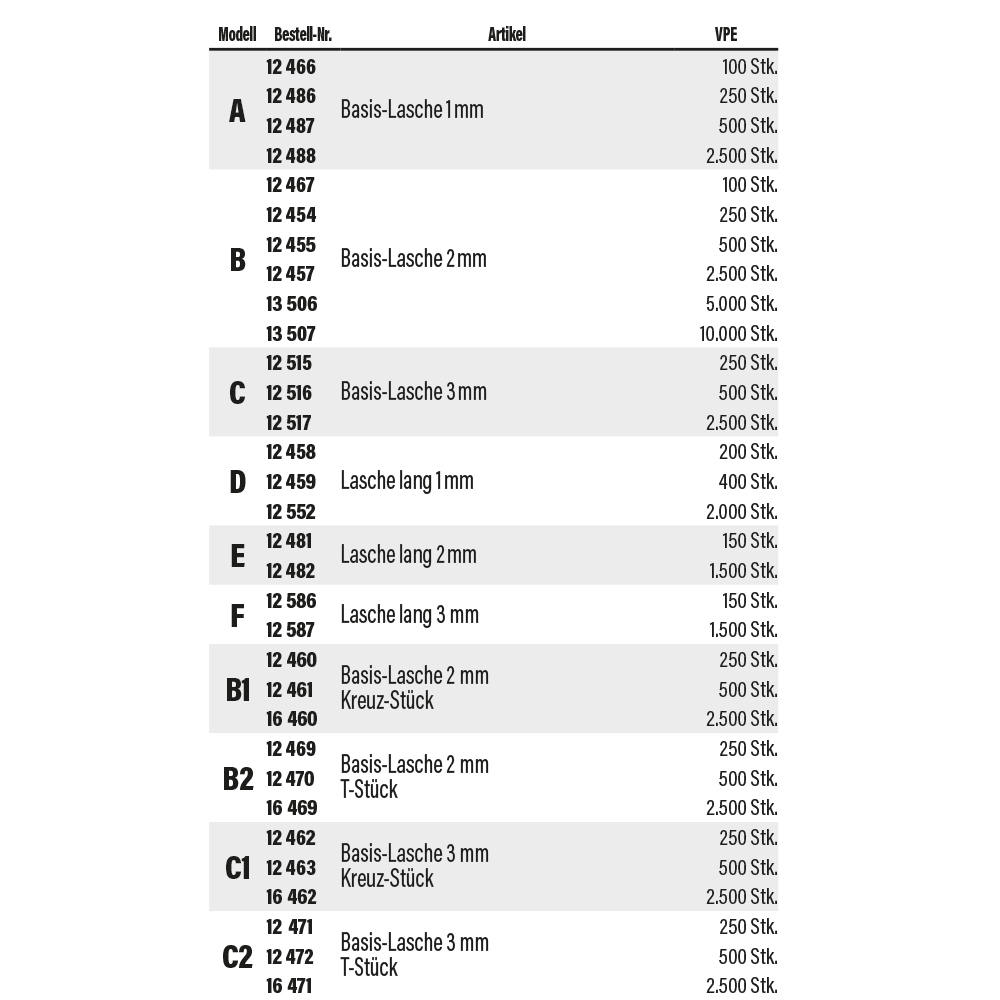
- Straps (basic, cross, and T-shaped) for tile thicknesses up to 30 mm in various joint widths and packaging units.
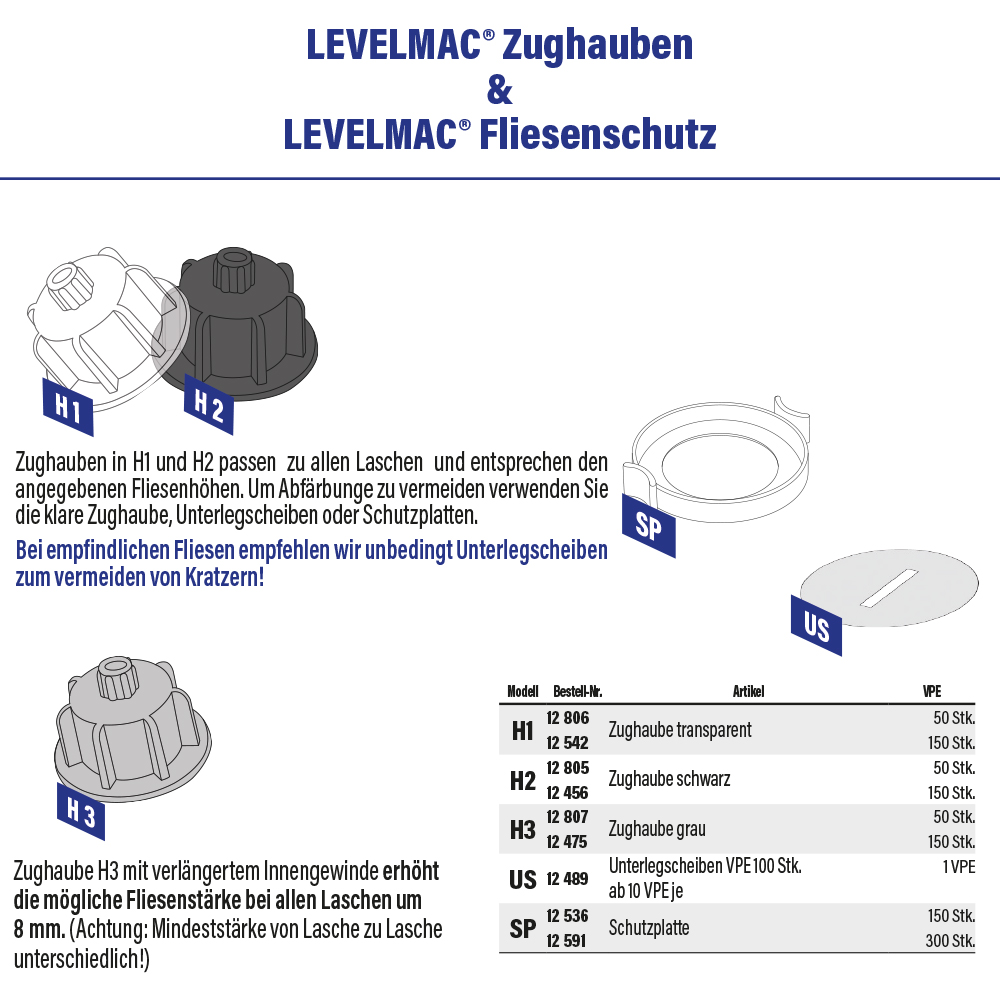
- Draw hoods, rotating caps: black, white, transparent, suitable for all LEVELMAC® threaded lugs
- Accessories: Tools such as
2. Wedge Levelling System by KARL DAHM
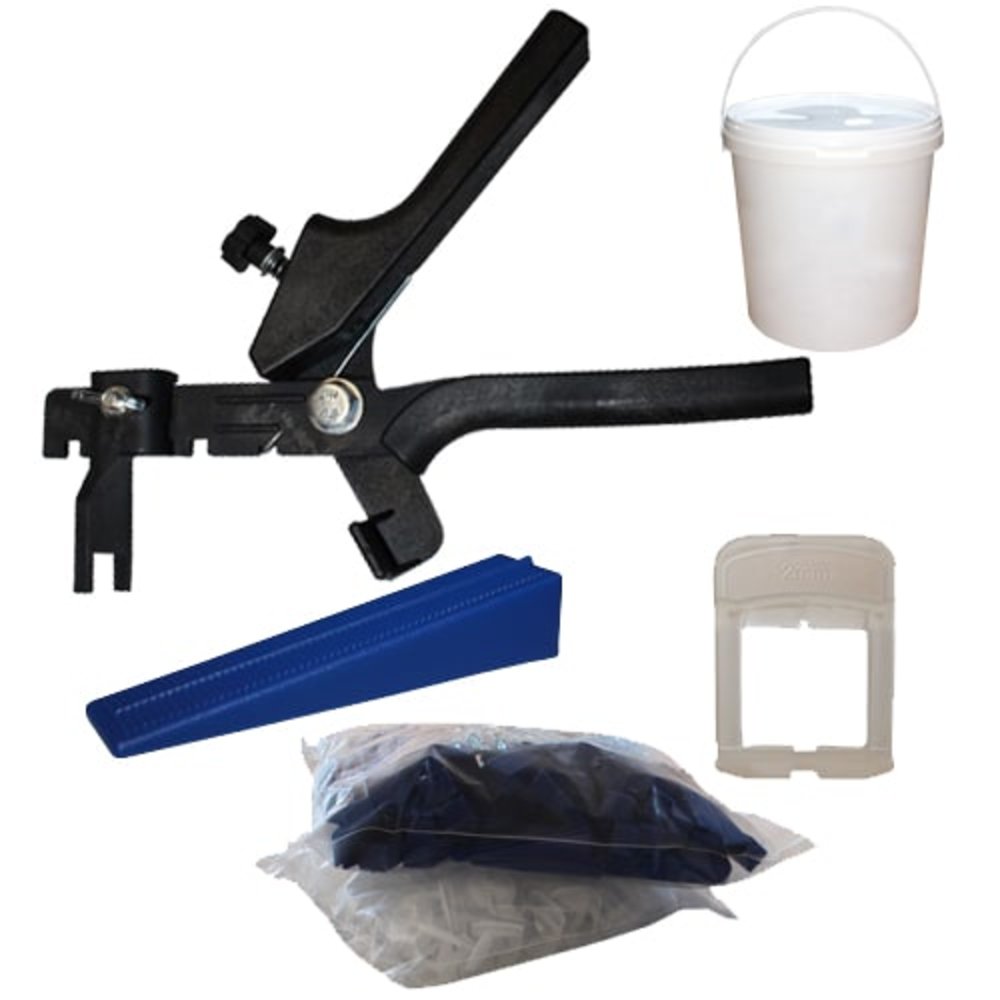
The wedge levelling system is a practical alternative, especially for large tiles. It includes a tile plier, wedges, and tension clips.
How to Use:
- Apply adhesive and lay the first tile.
- Insert the tension clip and place the next tile.
- Slide the wedge into the clip and secure it with the pliers.
- Allow to dry and snap off the tension clips.
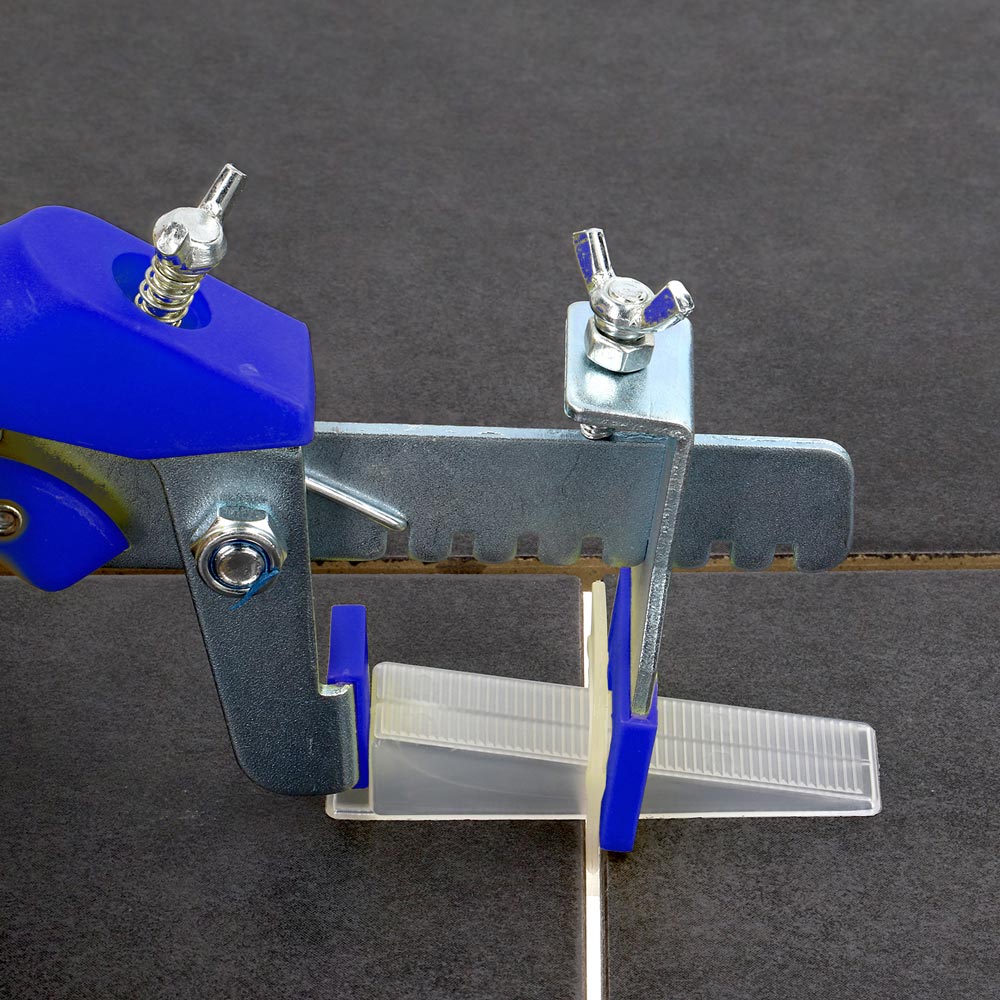
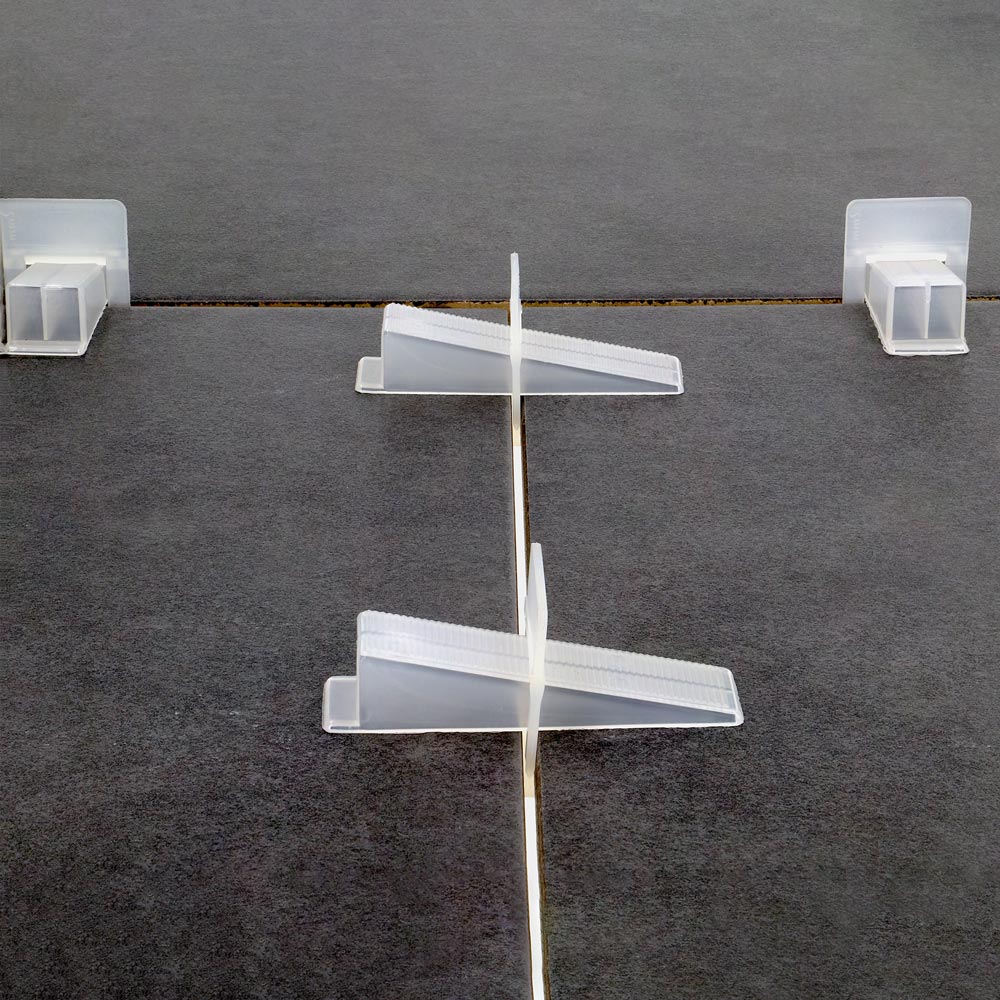
Difference from the LEVELMAC System:
- Uses wedges instead of caps.
- No post-installation adjustments.
Sets and Accessories:
- Starter Set 2 mm, 0–12 mm (100 clips, 50 wedges, plastic pliers), Art. No. 12055
- Wedge Set 2 mm, 0–12 mm (100 clips, 100 wedges, metal pliers), Art. No. 12053
- Tabs(100 pcs):
- Wedges (100 pcs): Blue plastic wedges, Art. No. 11084
- Accessories: Plastic and metal pliers, tile spacers, etc.
- Tile crosses and spacers
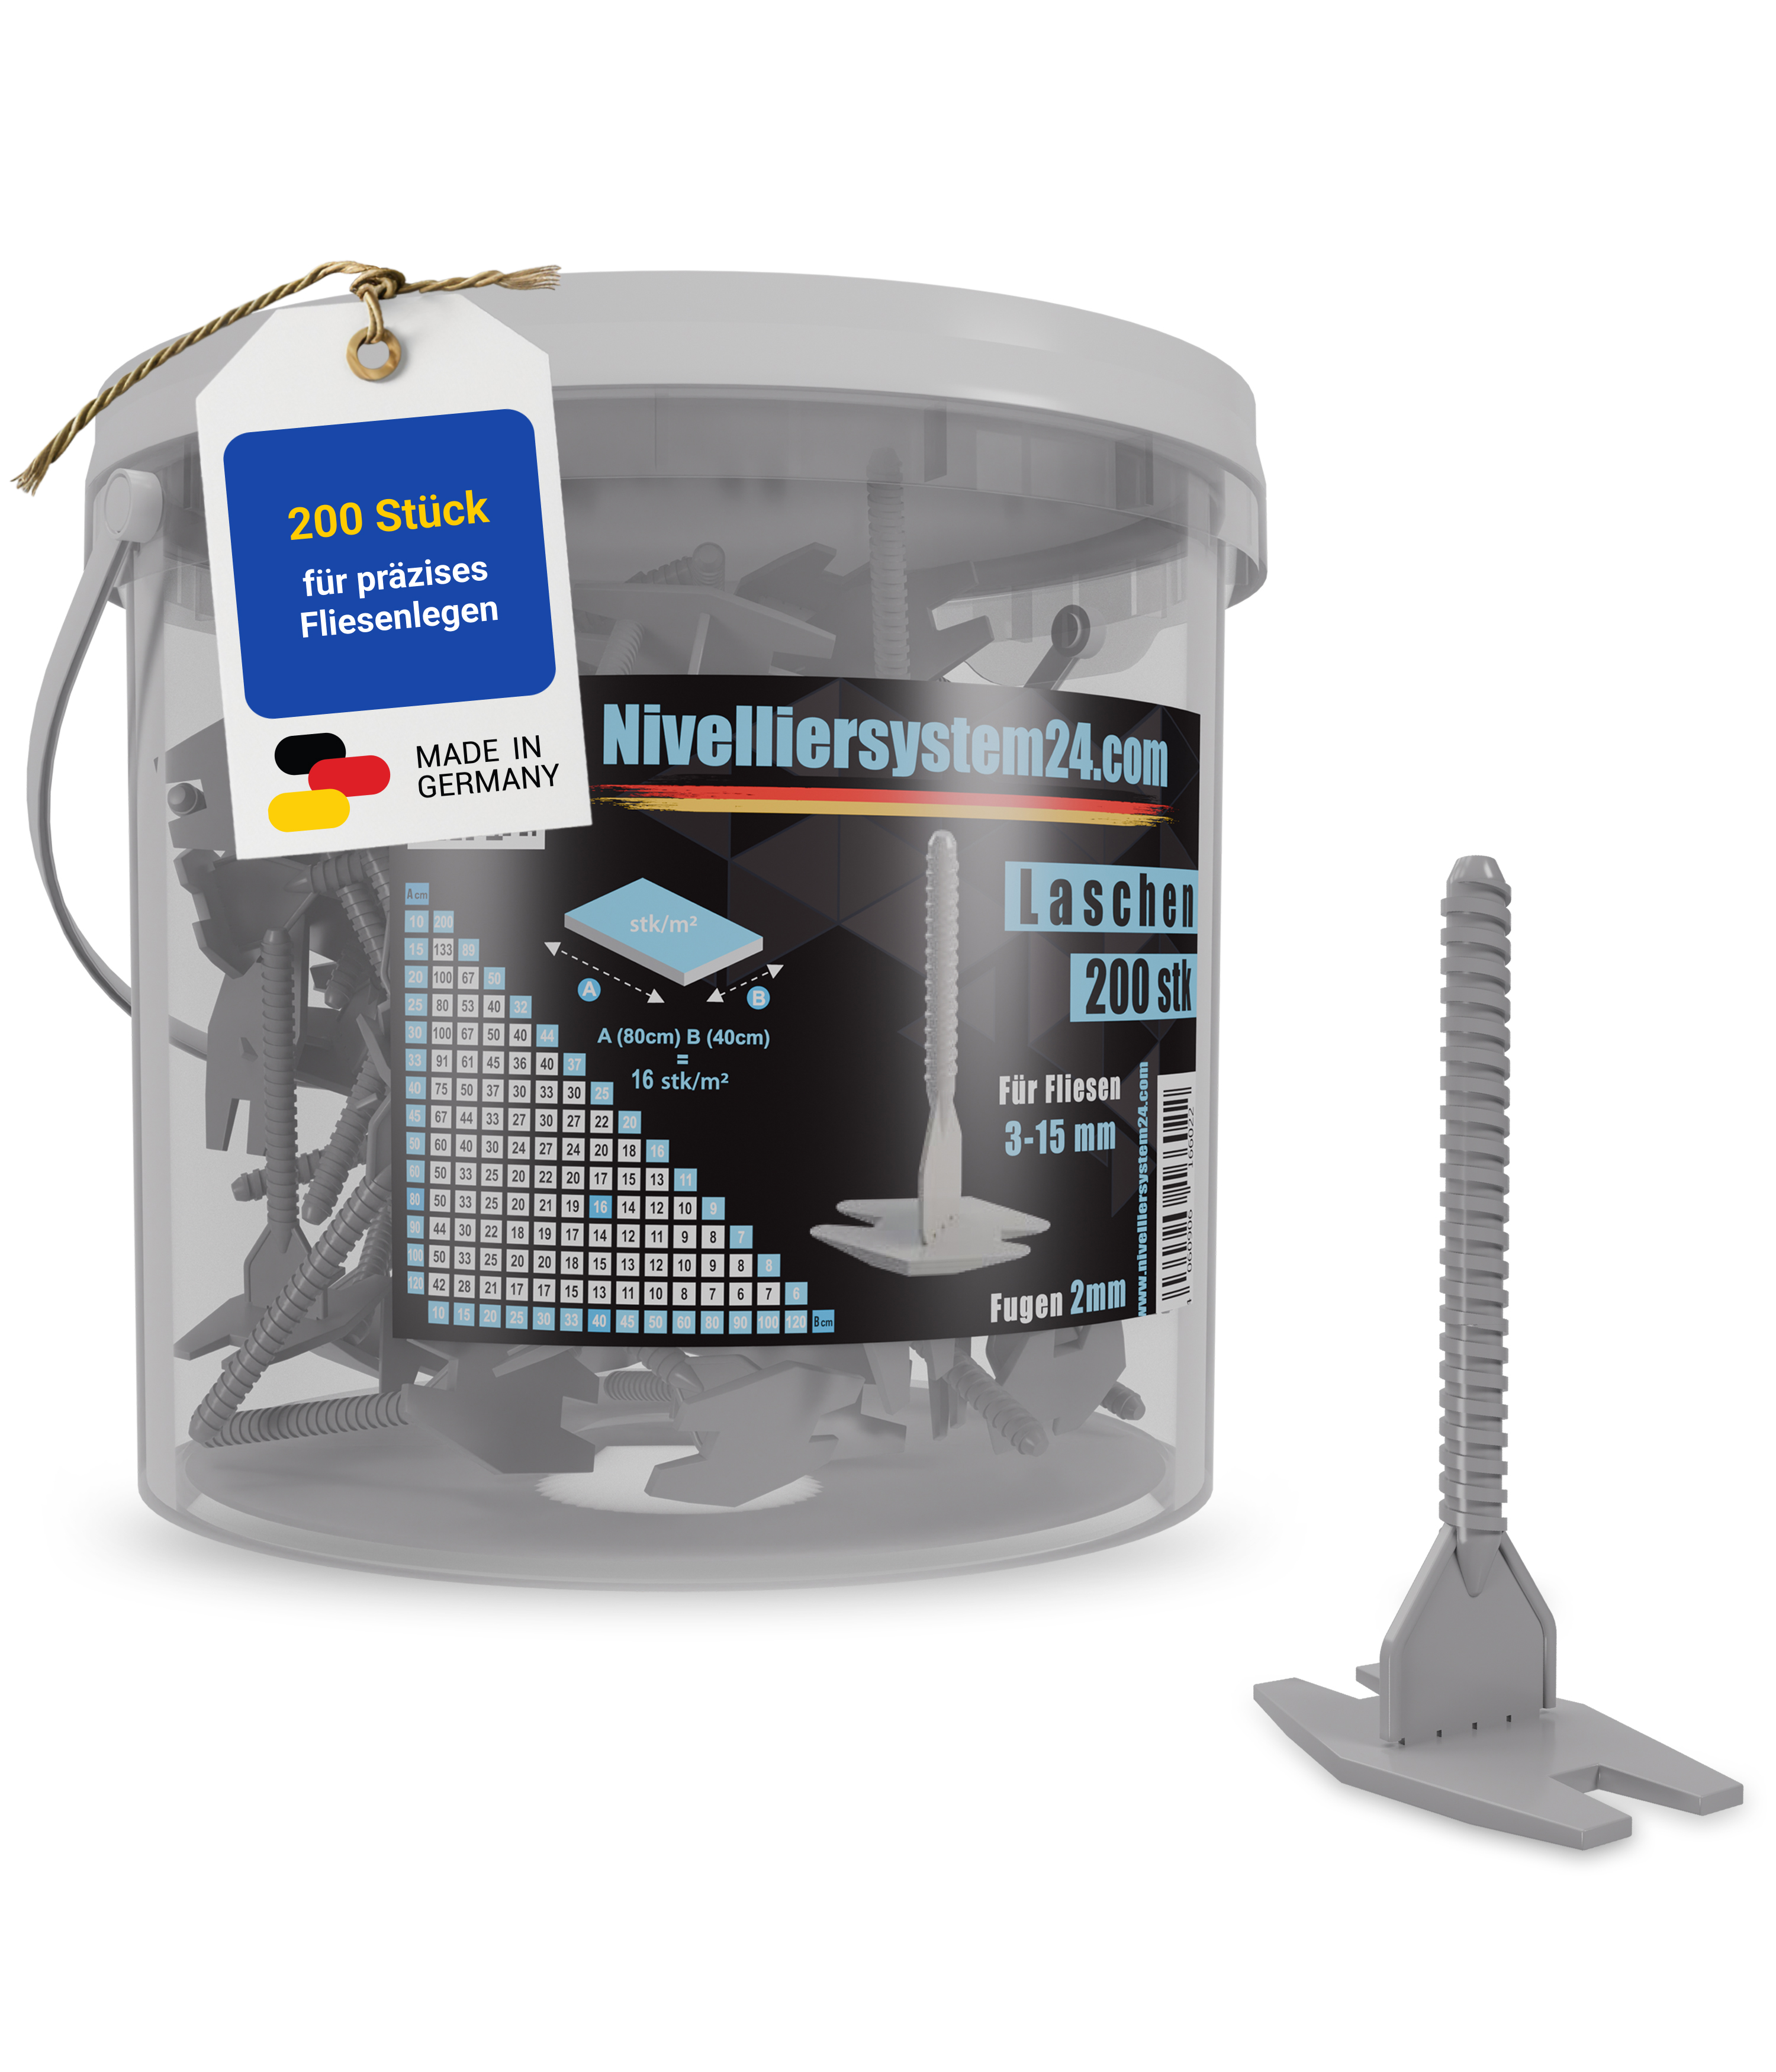
The Levelling System 24 offers a user-friendly solution for precise installation of tiles, porcelain, and natural stone, including large formats.
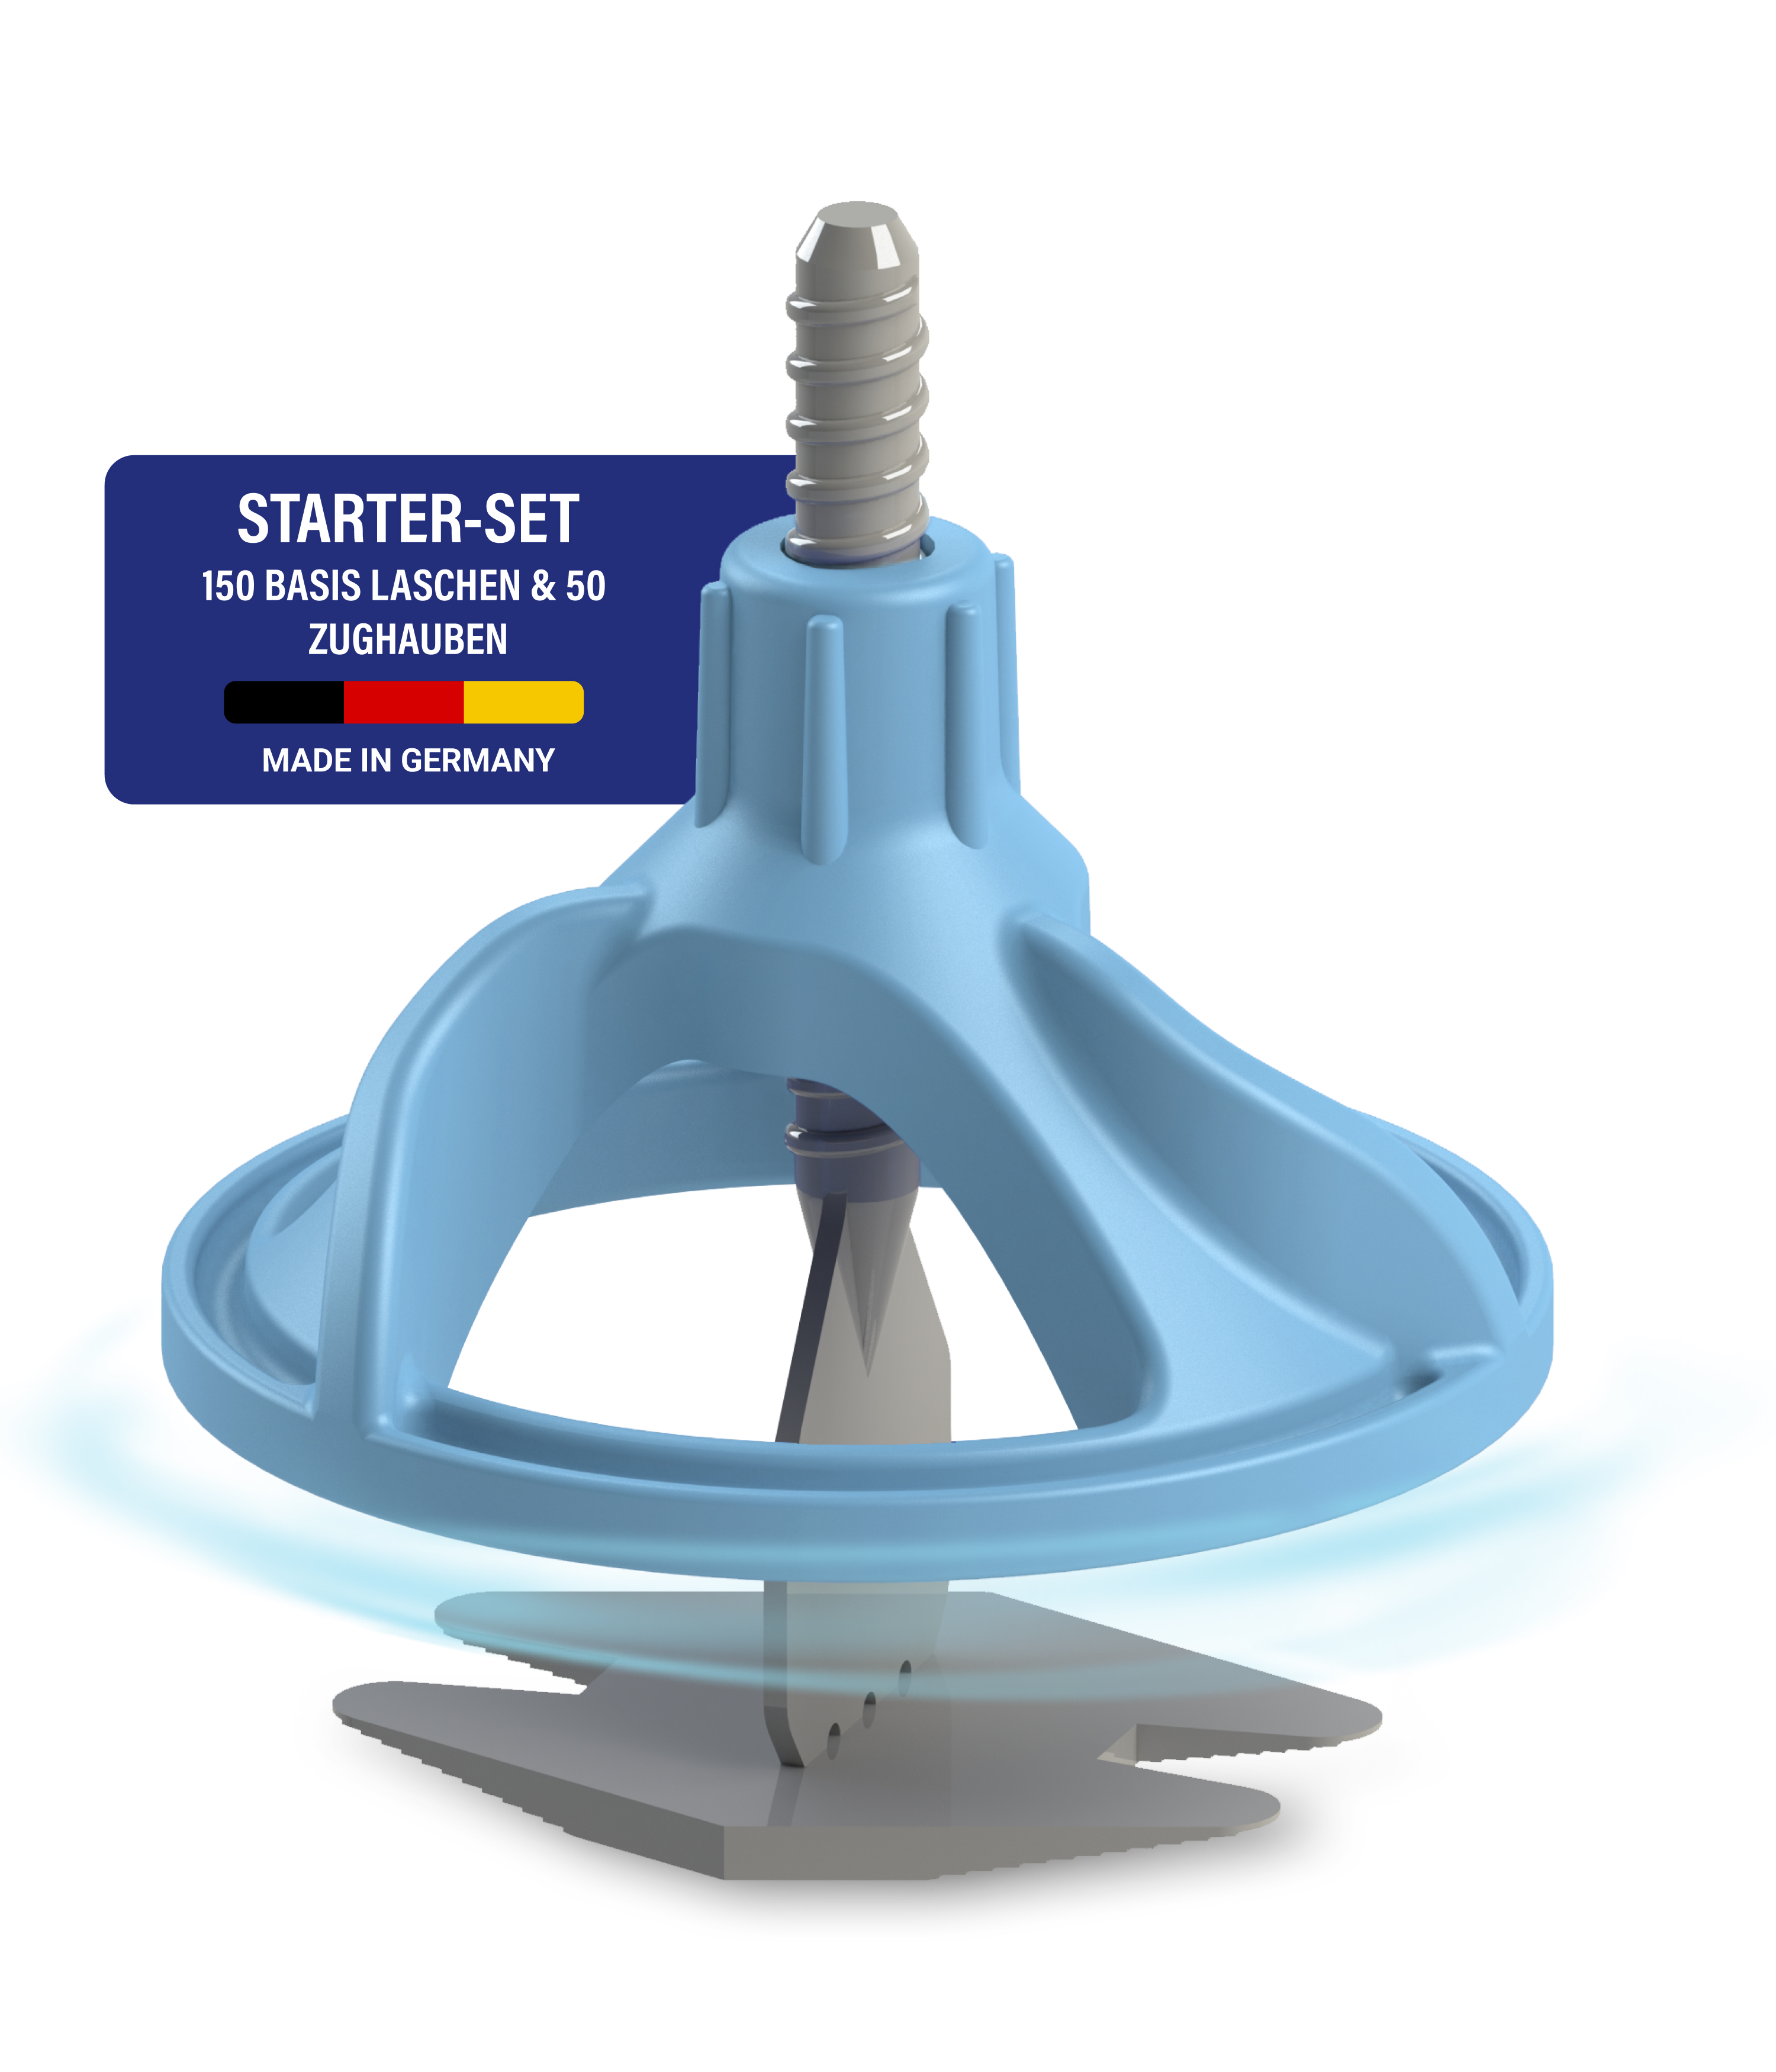
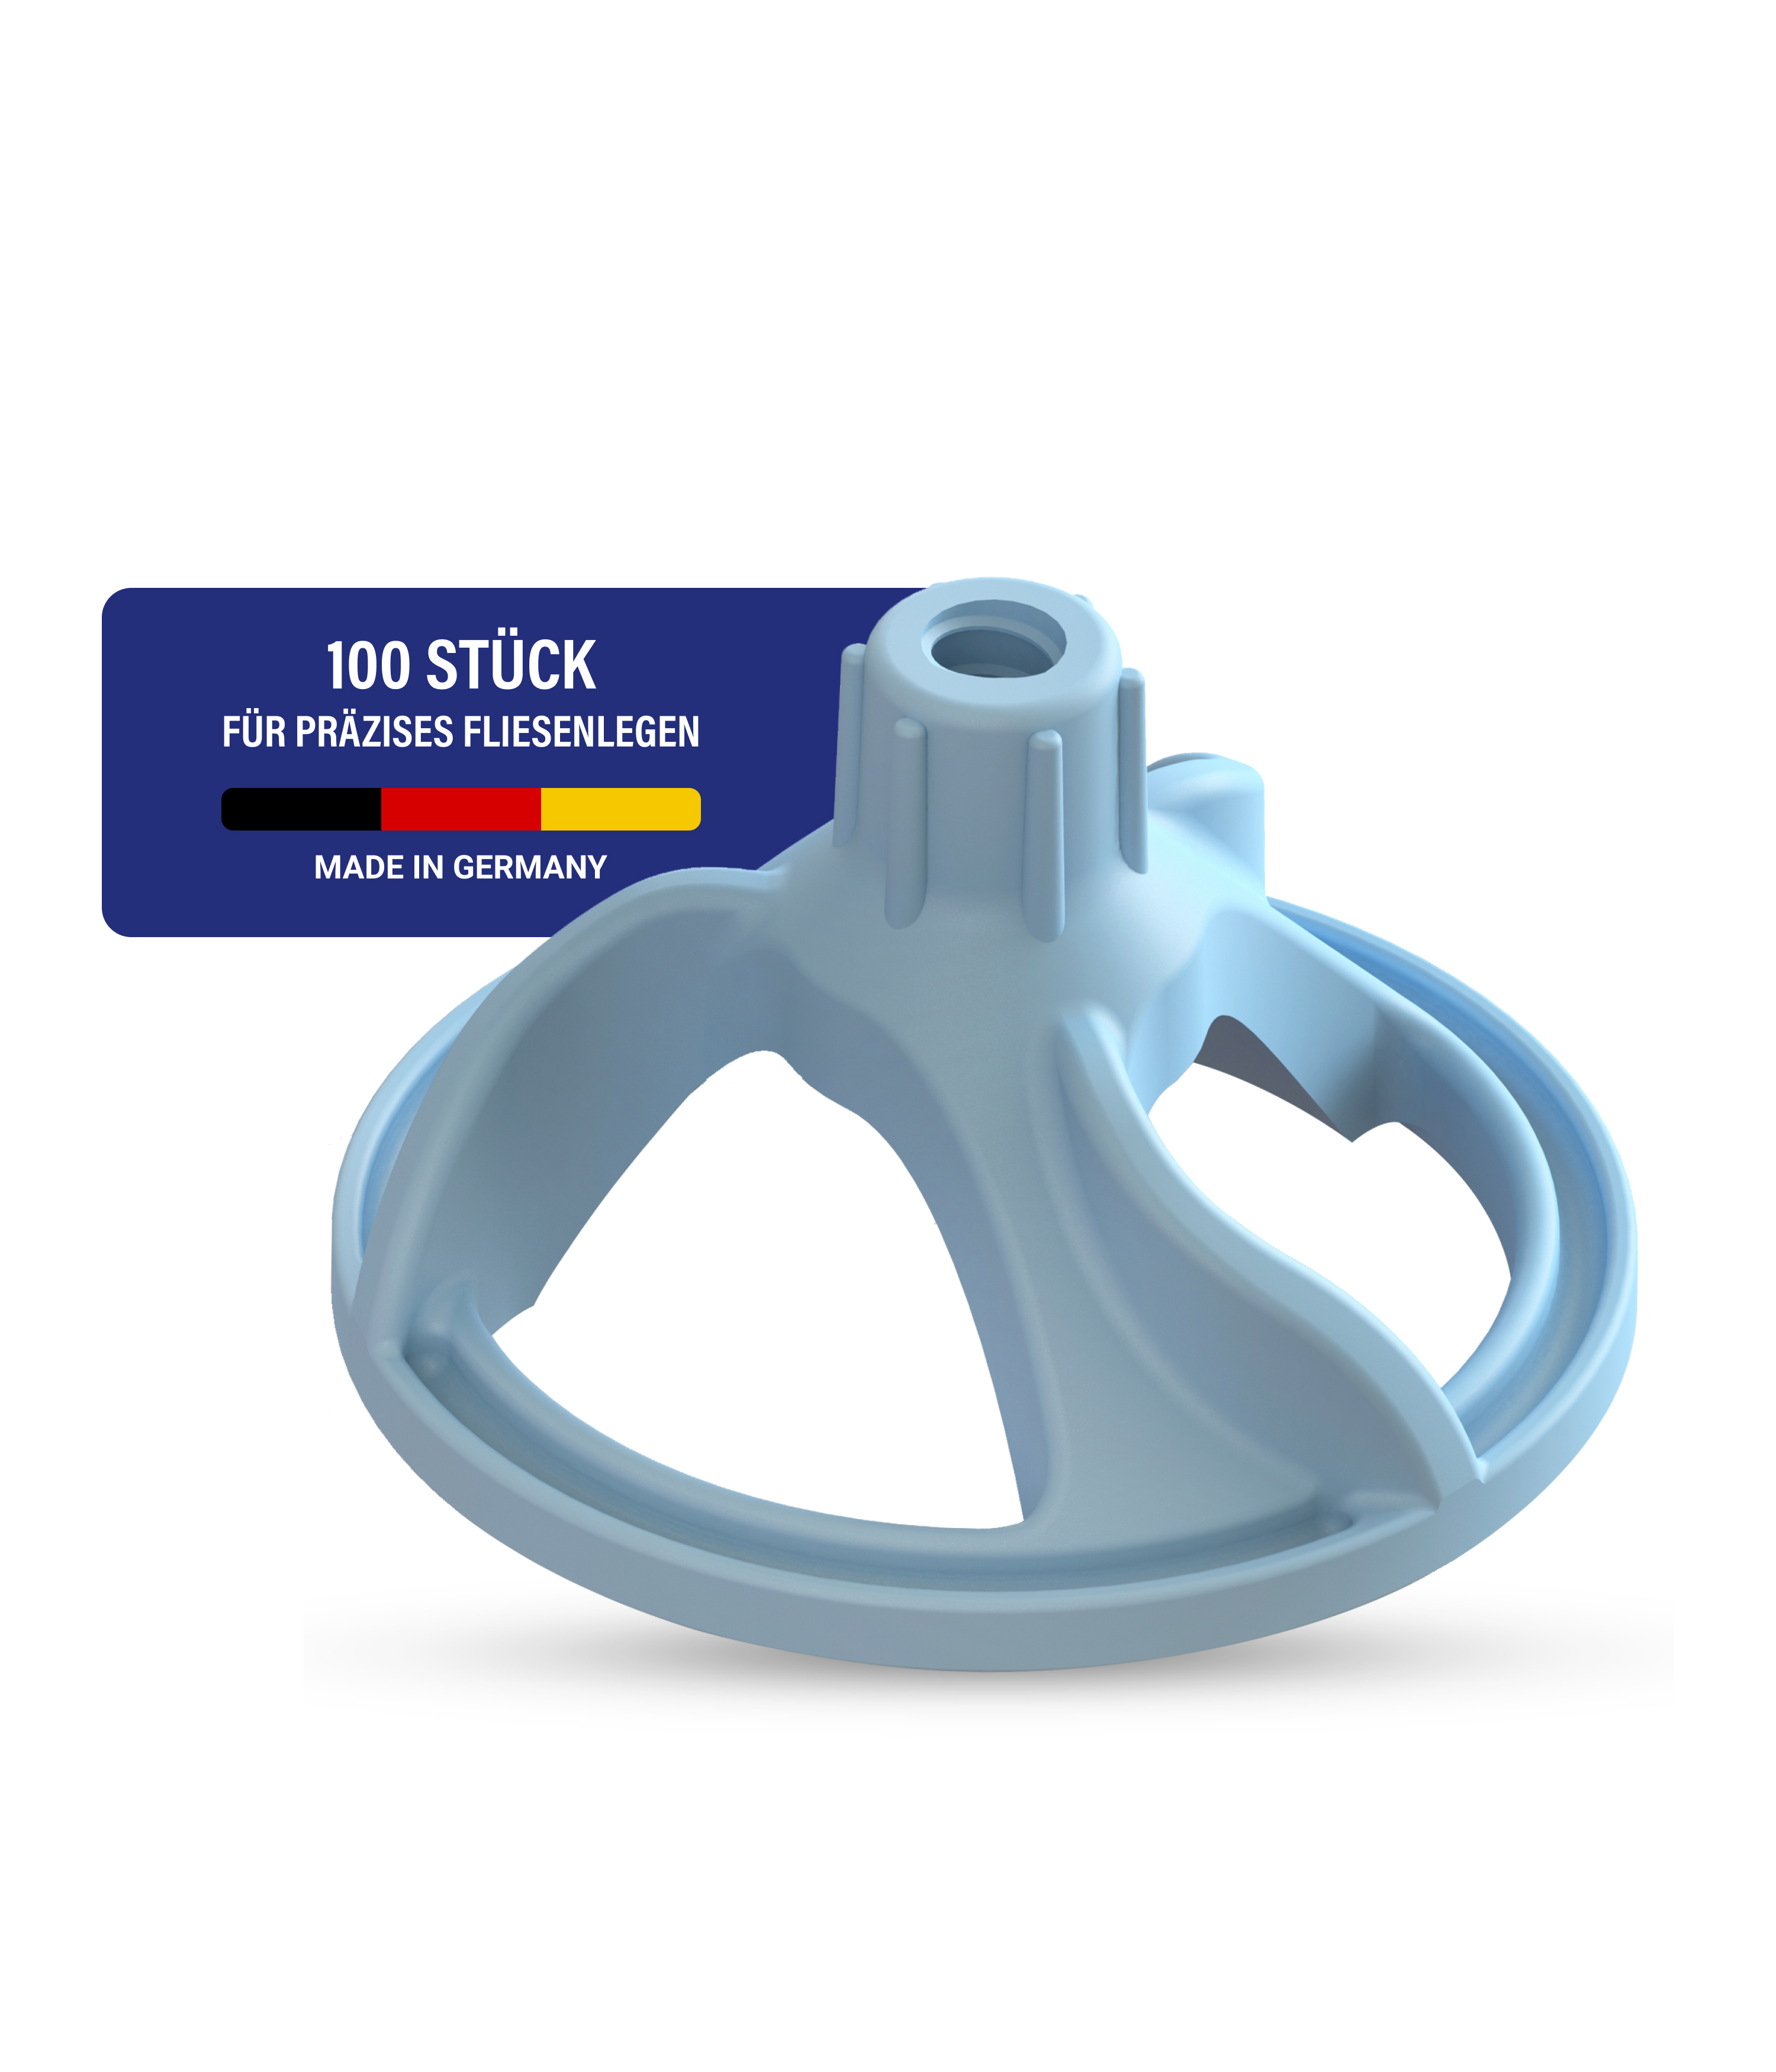
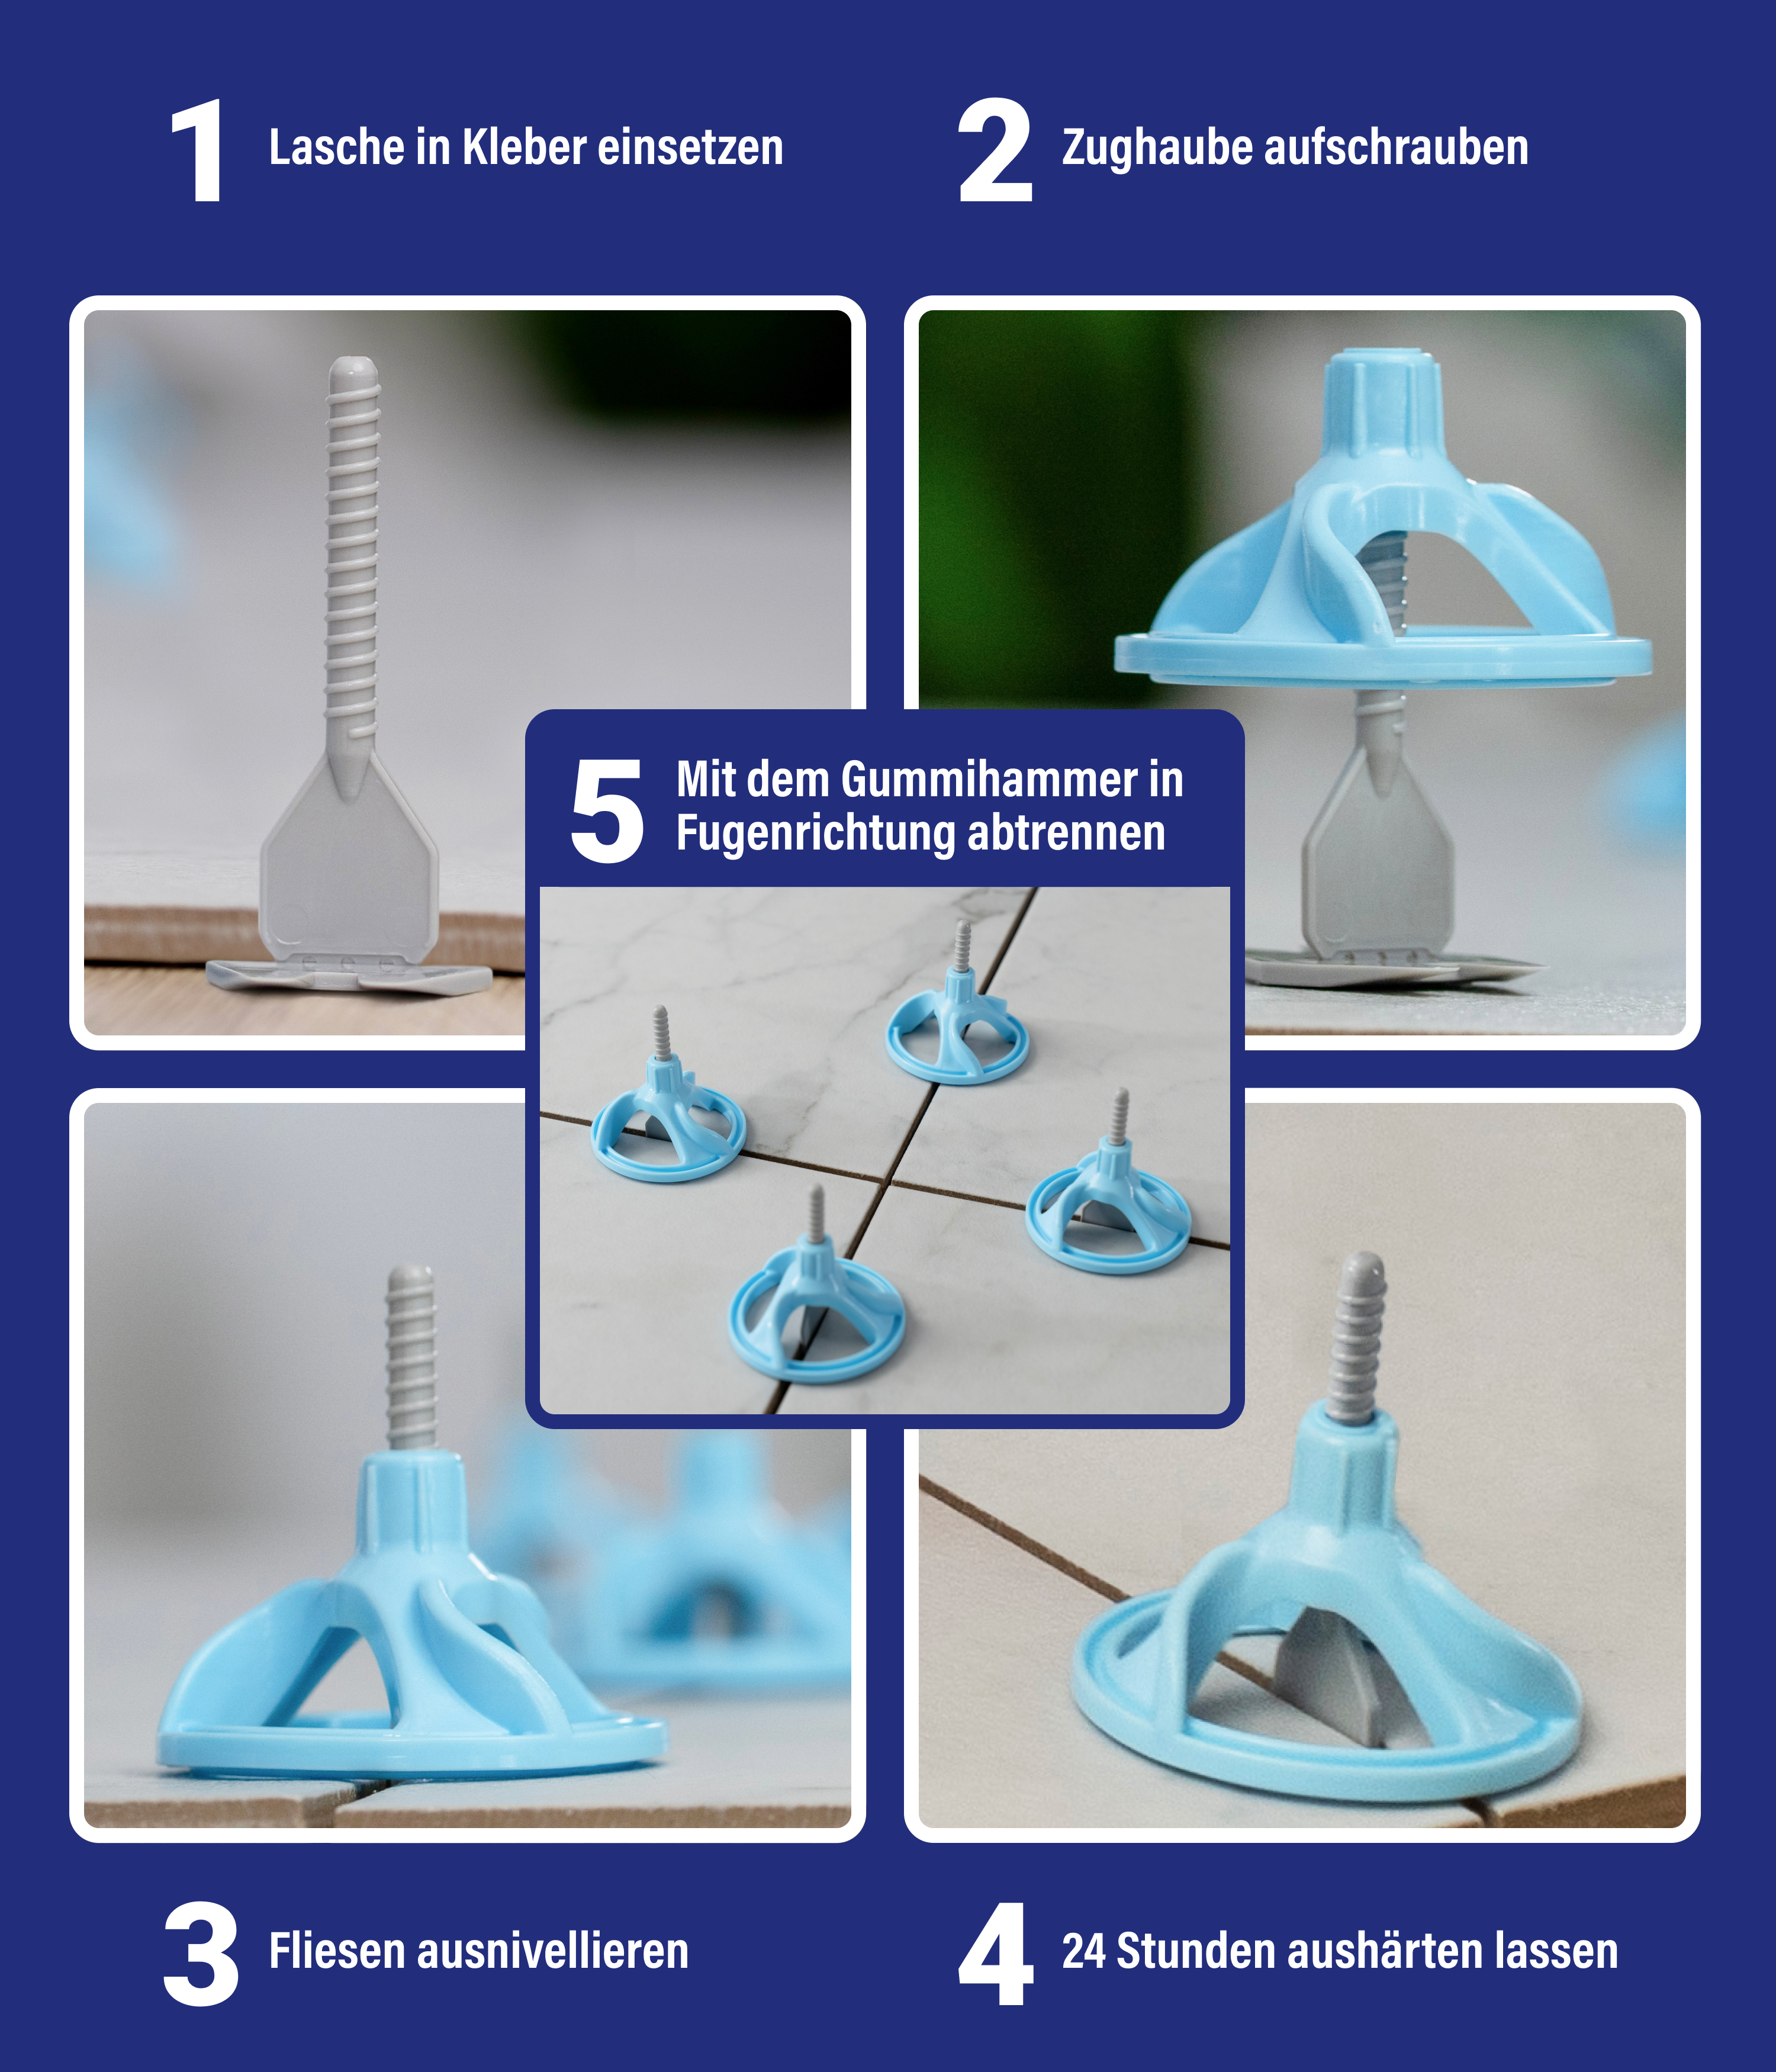
How to Use:
- Prepare the substrate and apply adhesive.
- Place spacers under the tiles.
- Attach caps to level the tiles.
- Remove caps and break spacers after drying.
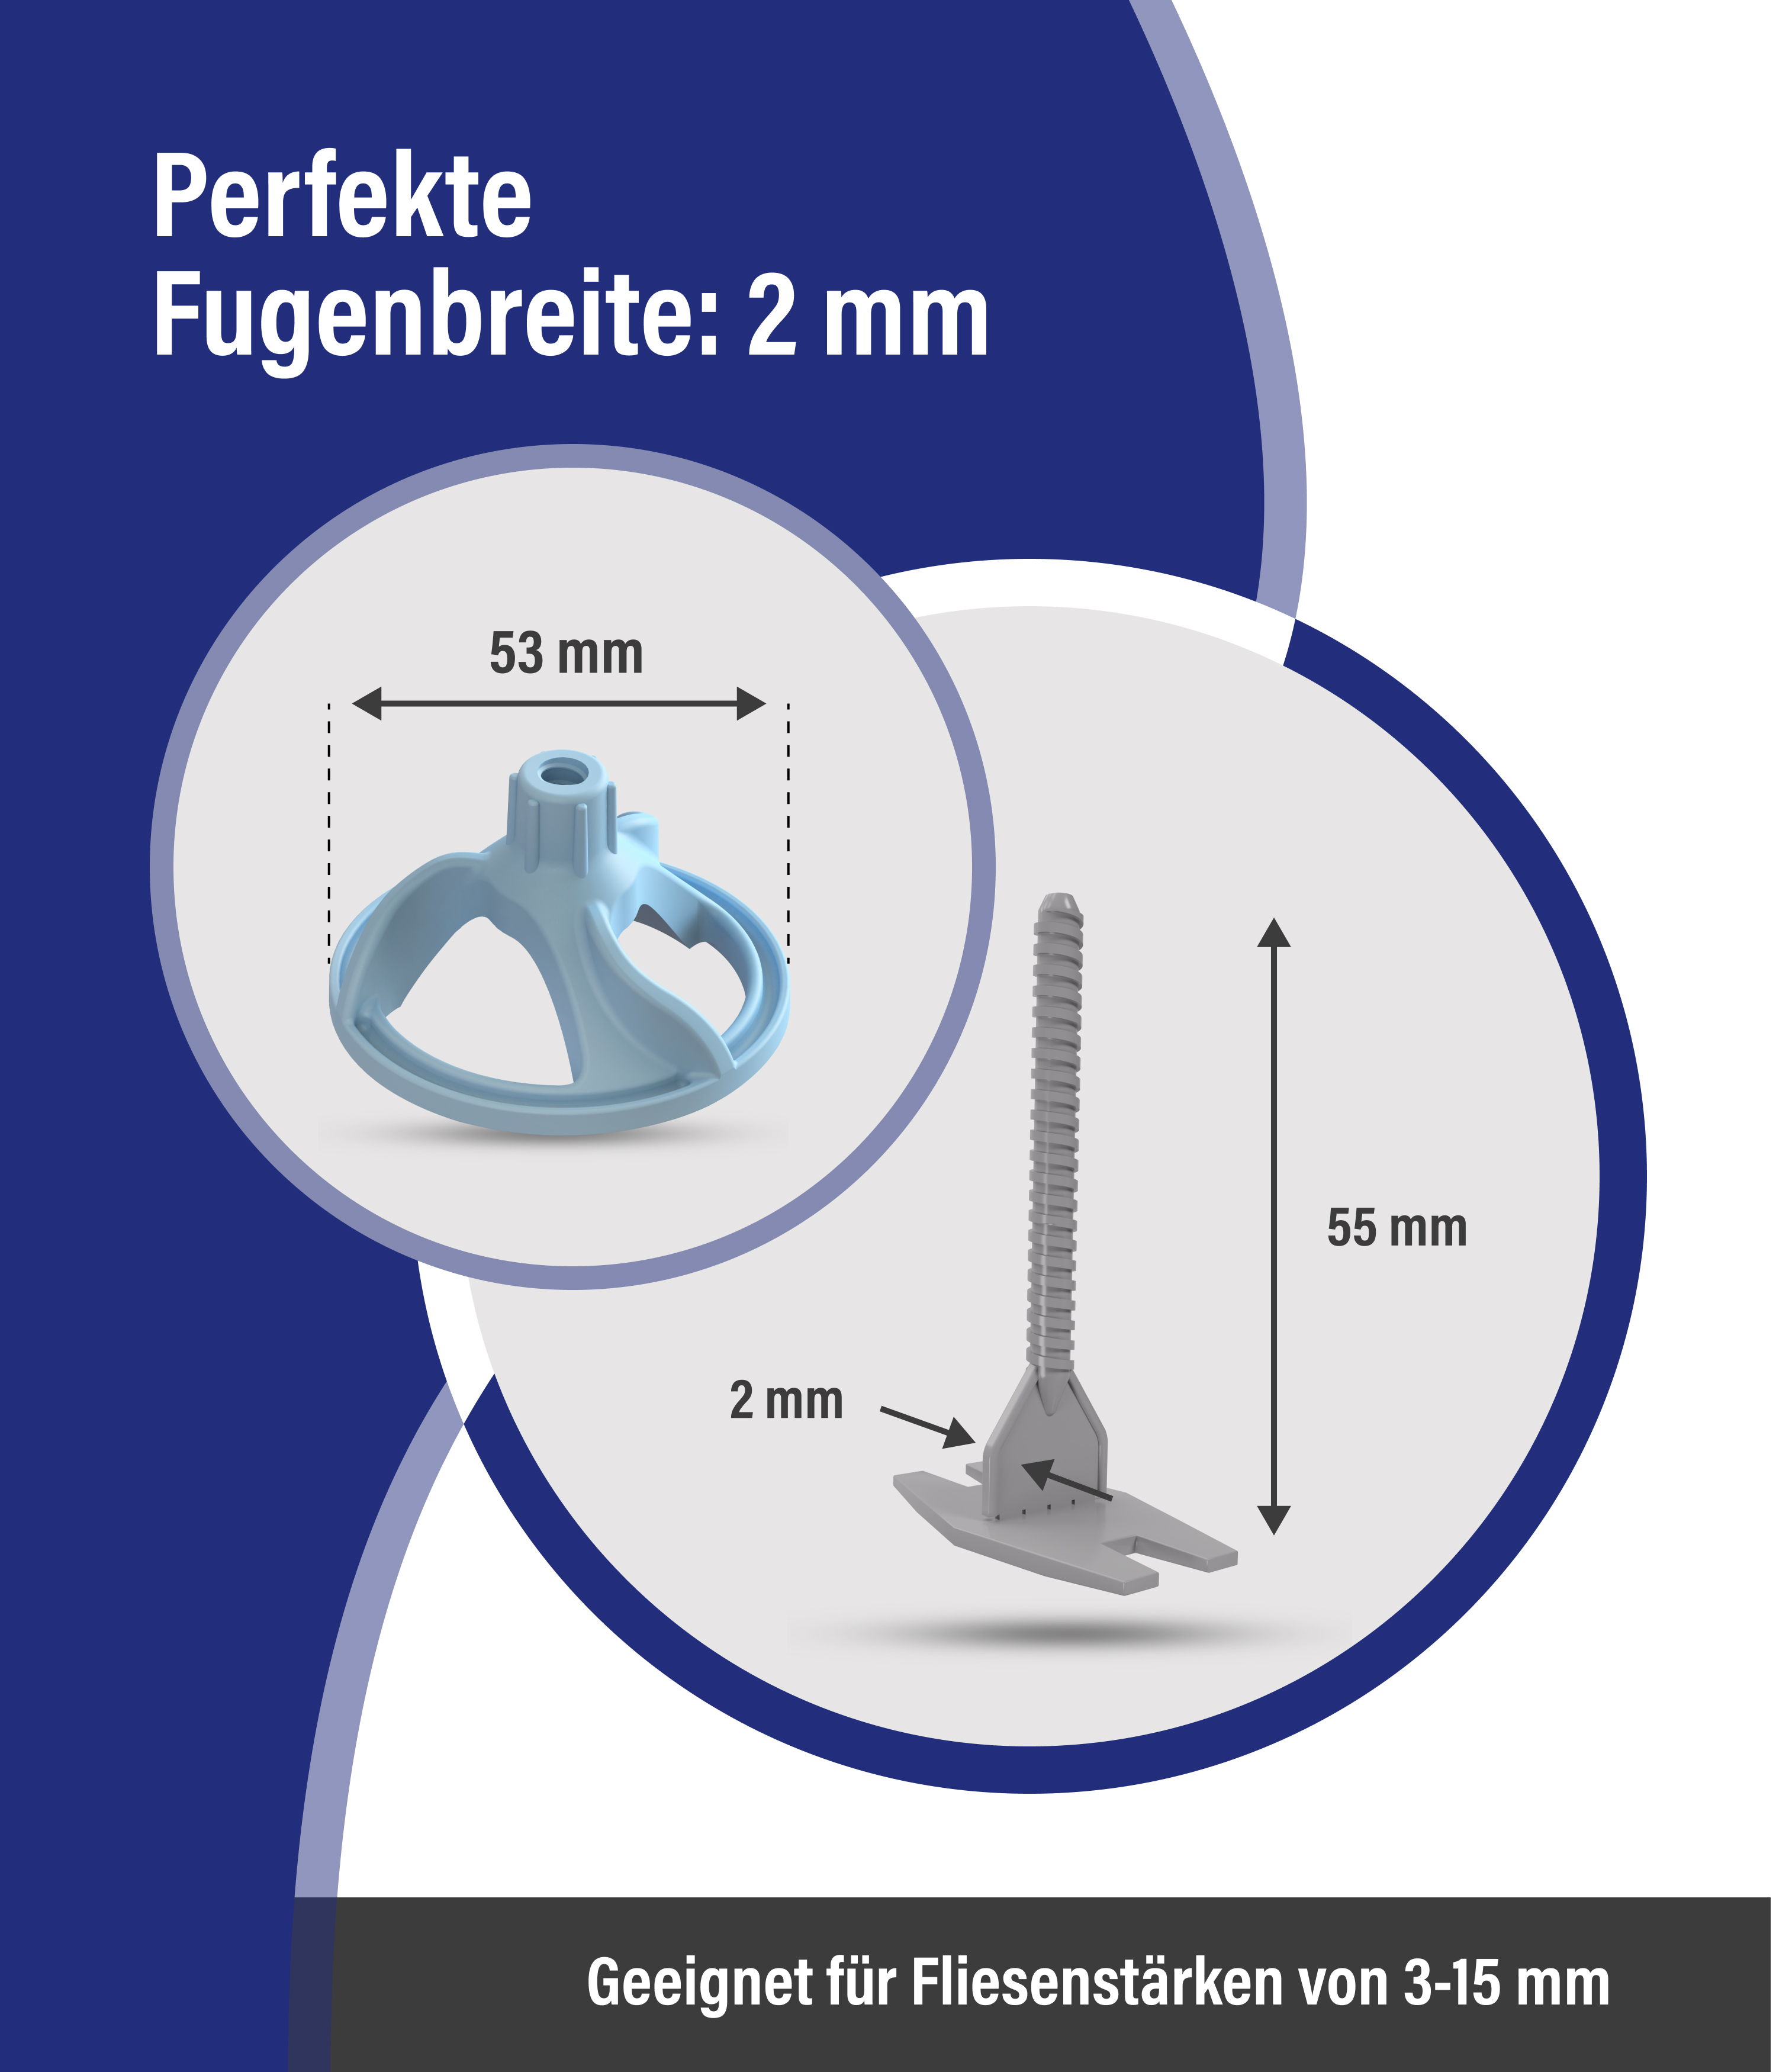
Advantages:
- Optimised thread guidance for effortless cap tightening.
- Reusable components for cost efficiency.
- Suitable for large tiles and easy to use without special tools.
Recommended Quantities per m²:
- 60x30 cm: 22 pcs
- 60x60 cm: 11 pcs
- 90x40 cm: 14 pcs
- 120x60 cm: 8 pcs
Sets and Accessories:
KARL DAHM outdoor levelling systems are designed for terrace tiles, enabling precise, lippage-free installation even for thick tiles.
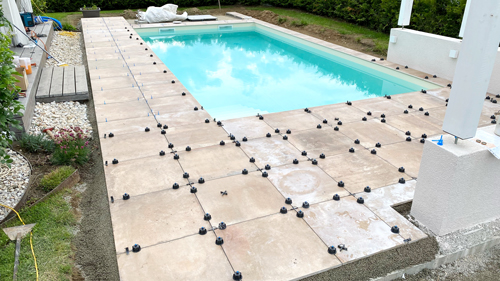
Advantages:
- Lippage-free installation for a safe, uniform surface.
- Flexibility for walls and floors.
- Weather-resistant design for outdoor use.
FAQ:
- Tile thickness: Up to 30 mm with 3 mm joint width.
- Applications: Suitable for walls and floors.
Sets:
- Terrace and tile sets for thick tiles (10–30 mm):
Why Use a Levelling System?
A tile levelling system ensures a flat surface, prevents lippage, saves time, and creates a perfect joint appearance—especially for large-format tiles.
Your Advantages at a Glance:
- Time-saving and precise results.
- Reusable components for cost efficiency.
- Suitable for indoor and outdoor use.
Our unique selling points - Quality from Karl Dahm
- Durability: Our products are robust and can be used multiple times.
- Flexibility: Whether indoors or outdoors, small or large tile formats - we have the right system.
- Customer service: Personalised advice from our trained team, fast delivery times and a wide range of accessories.
Discover the perfect system for your project and achieve precision in tile installation. Explore our range today!


